Technique: Mirror glaze

Mirror glaze has always felt like magic to me — the kind of thing you see once and think, I need to try that.
I’ve been in pastry for 13 years, and it’s still one of the most mesmerizing techniques I know. Honestly, I think I got into entremets just so I could pour my first glaze. It turned out kind of terrible — but I kept going. I played with colors, tried tiger effects, got completely obsessed for a while.
Then I moved on. Tarts, pavlovas, tiered cakes… and glaze just slipped out of the picture. It’s funny how it’s always been treated as something just for tiny desserts. I never really questioned it.
Until lockdown — when I tried glazing a two-tier cake at home. And it worked. Actually, it worked even better than I expected. Watching it drip down a full-sized cake was oddly satisfying, and the final look? Wild, a little unpredictable, but so elegant.
Now I use glaze when I want to finish a cake in a cool, simple way. No extra decoration, no fuss. Just pour — and it’s done. And somehow, that feels like enough.
Ingredients needed to glaze a 3 tier cake :
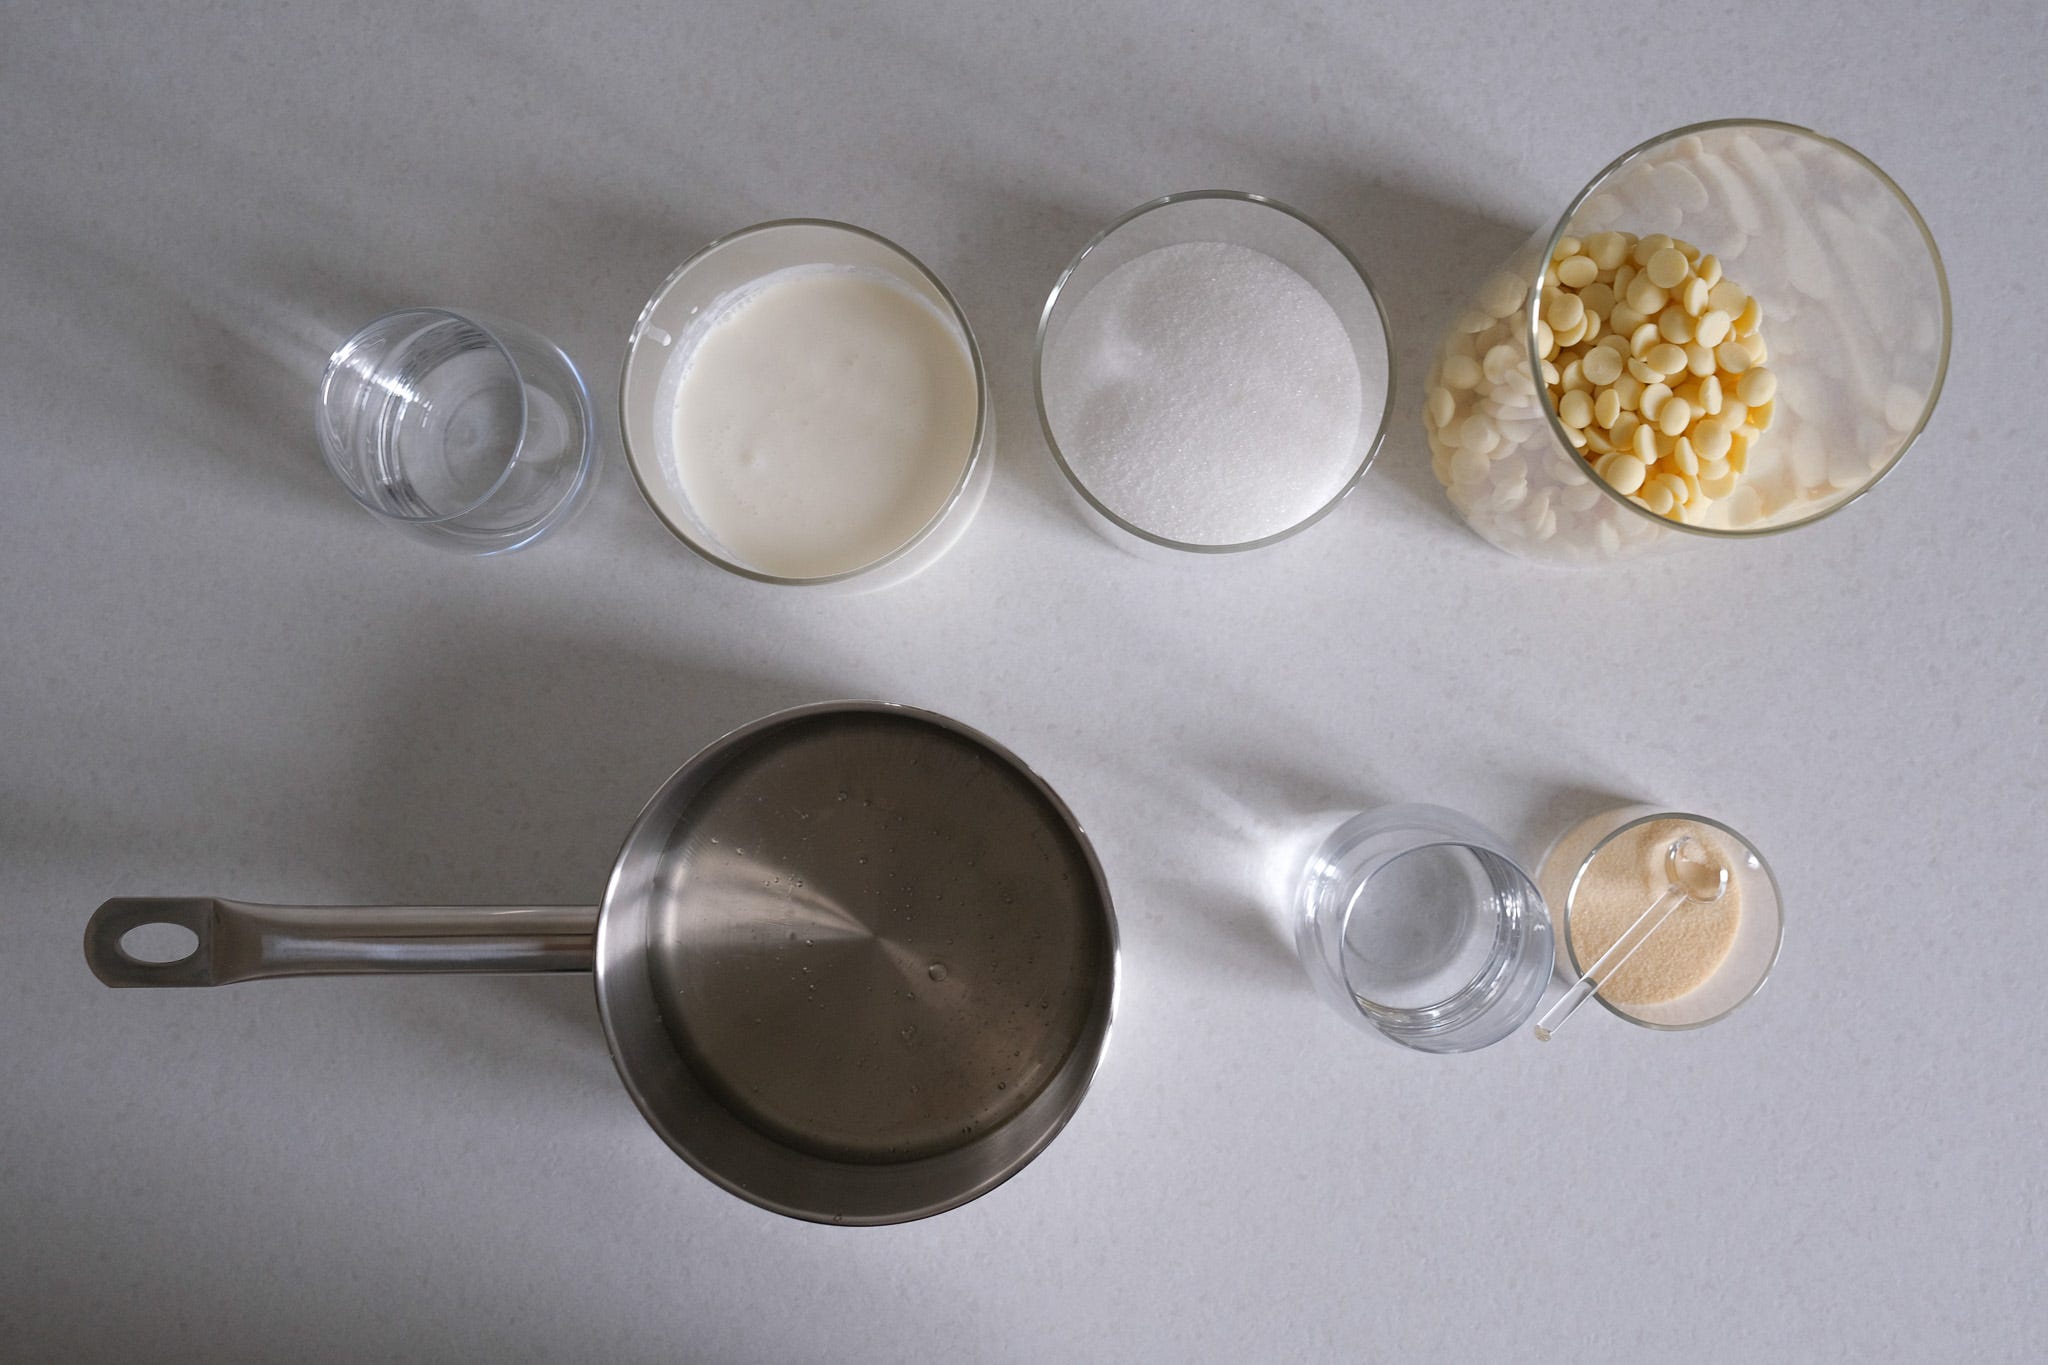
300 g Sugar
300 g Glucose syrup (I use from the brand Toufood)
150 g Water
200 g Heavy Cream 30-35% (I use Elle Vire or President)
21 g Gelatin 200bloom (sometime called gold, I use from the brand InkaFoods it is halal and kosher)
300 g White chocolate
0.5 z g White, burgundy and purple water or oil soluble food colorings ( I recommend Colour Mill, promo code “Merul10” gives you 10% off)
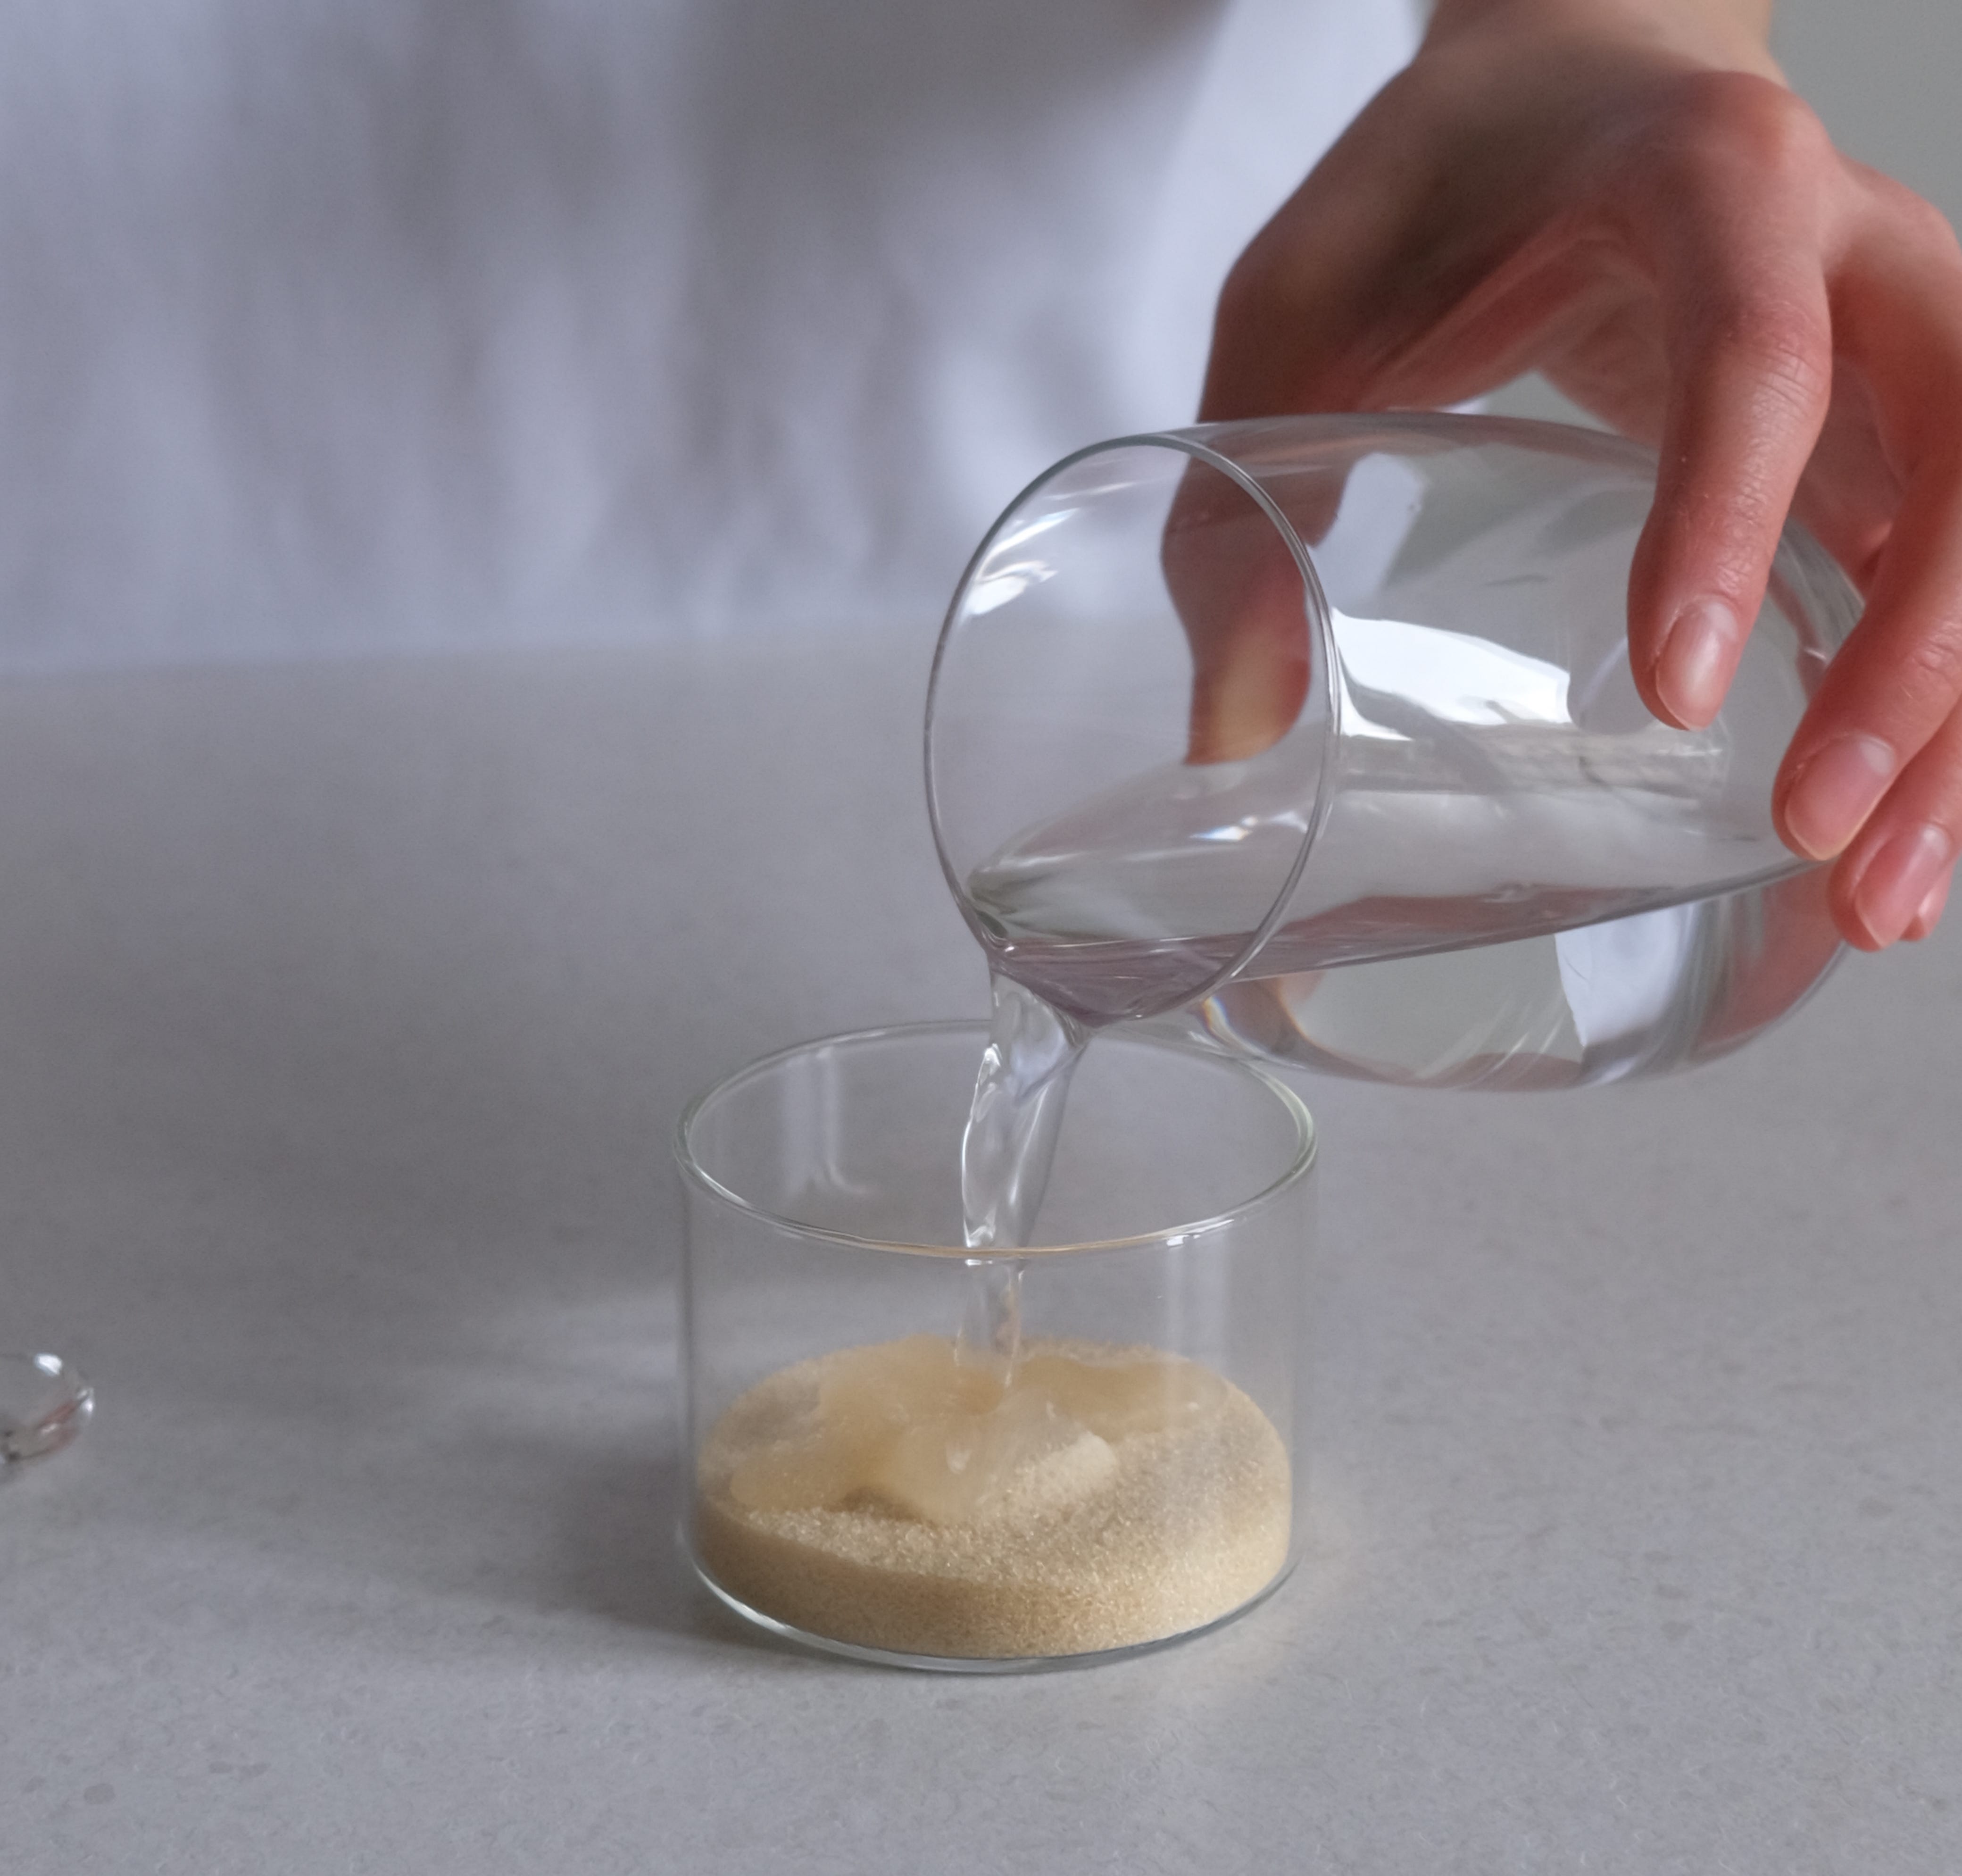
Mix gelatin with cold or room-temperature water in a 1:6 ratio. Let it sit for 15–20 minutes to bloom.
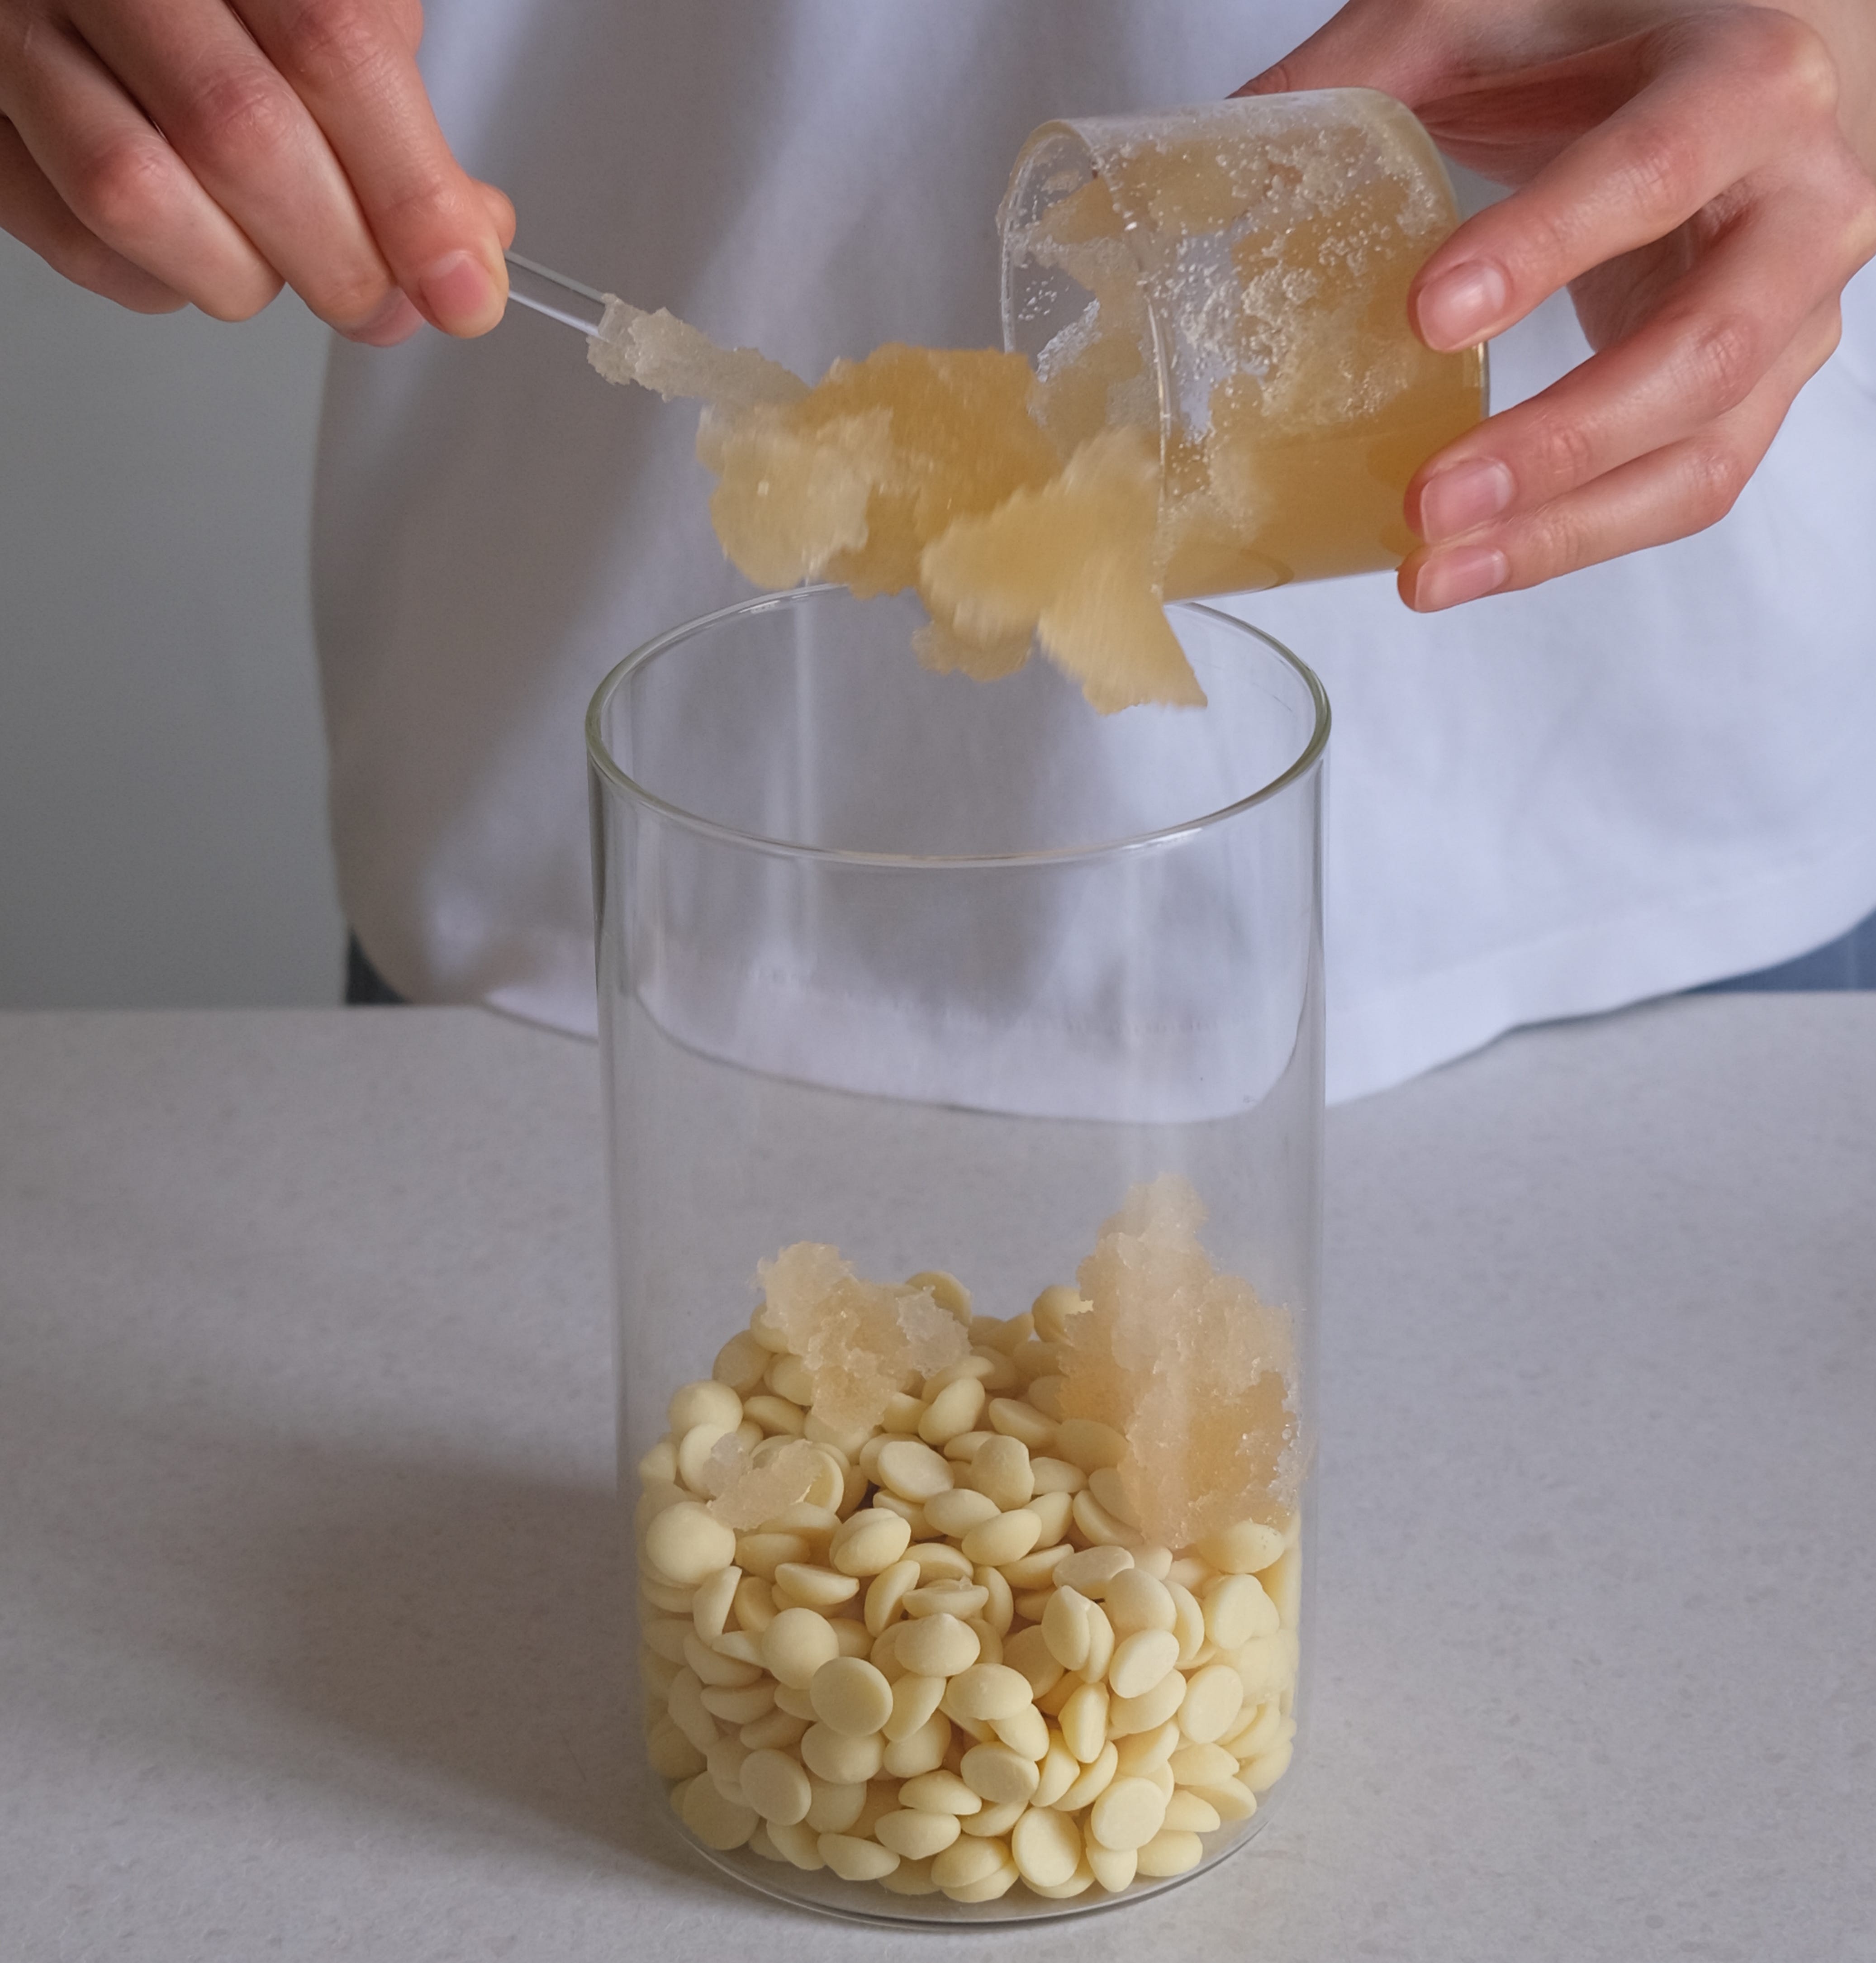
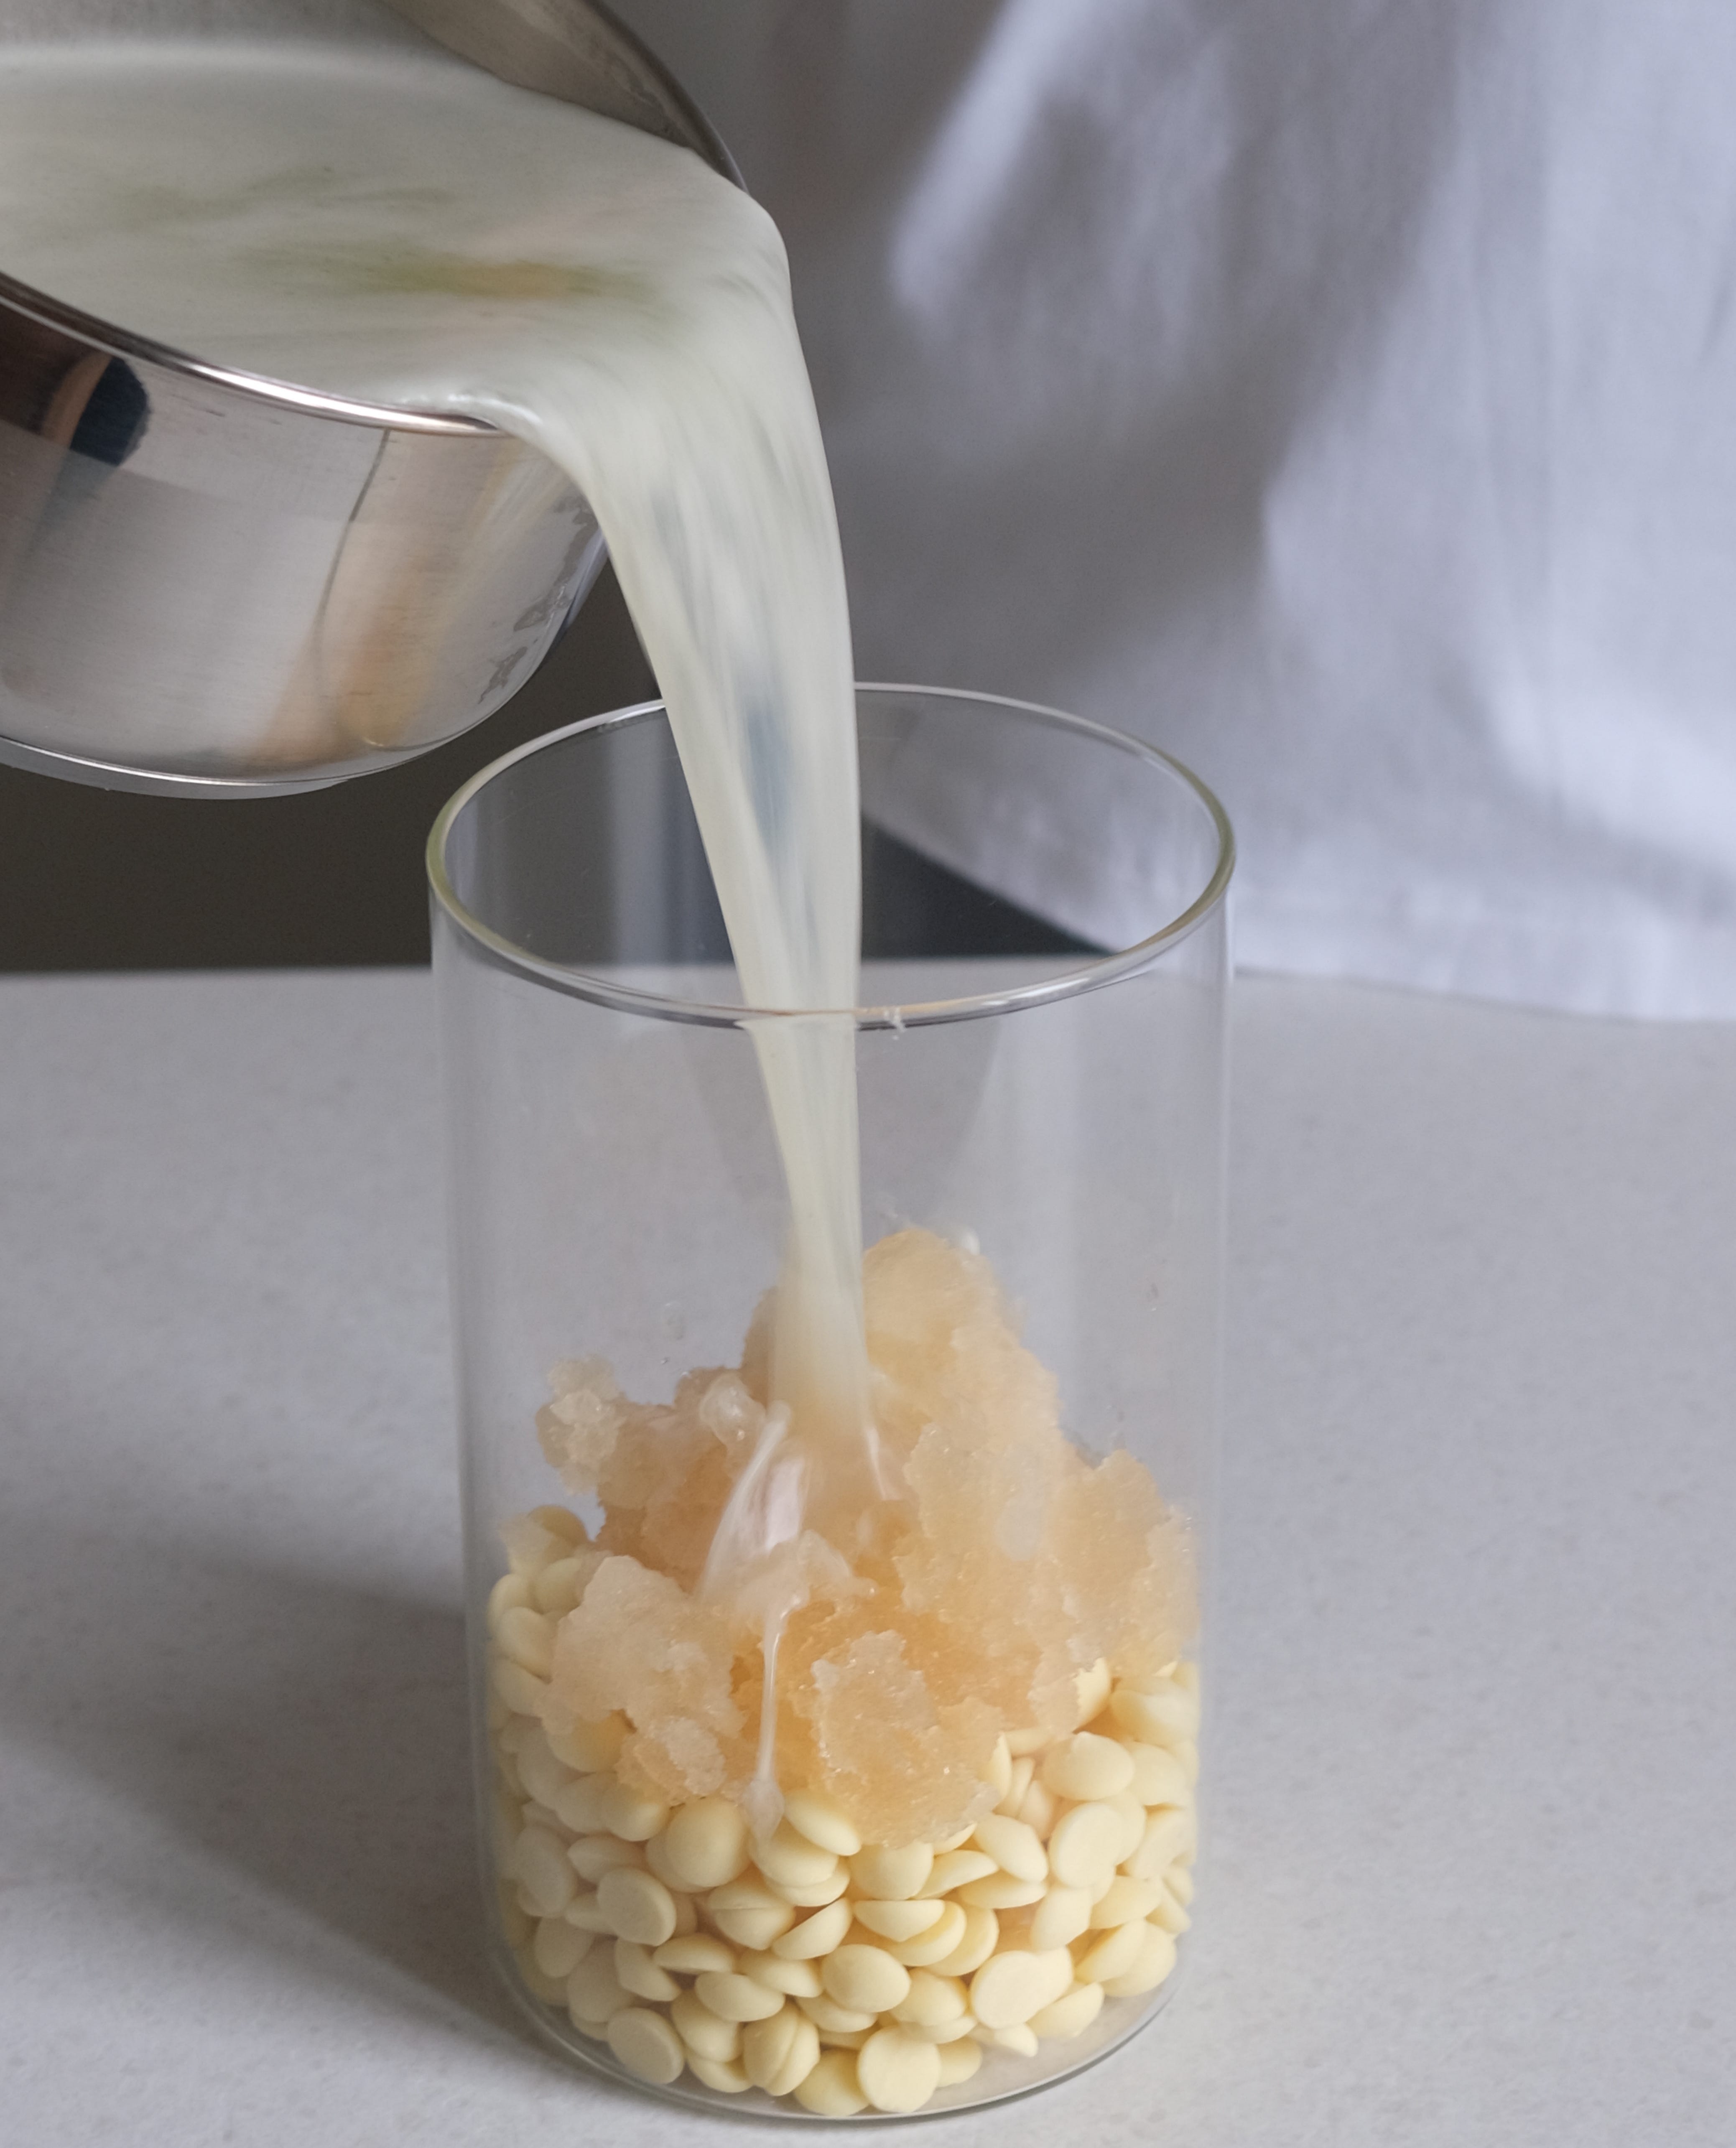
Mix the white chocolate and bloomed gelatin in a tall cup.
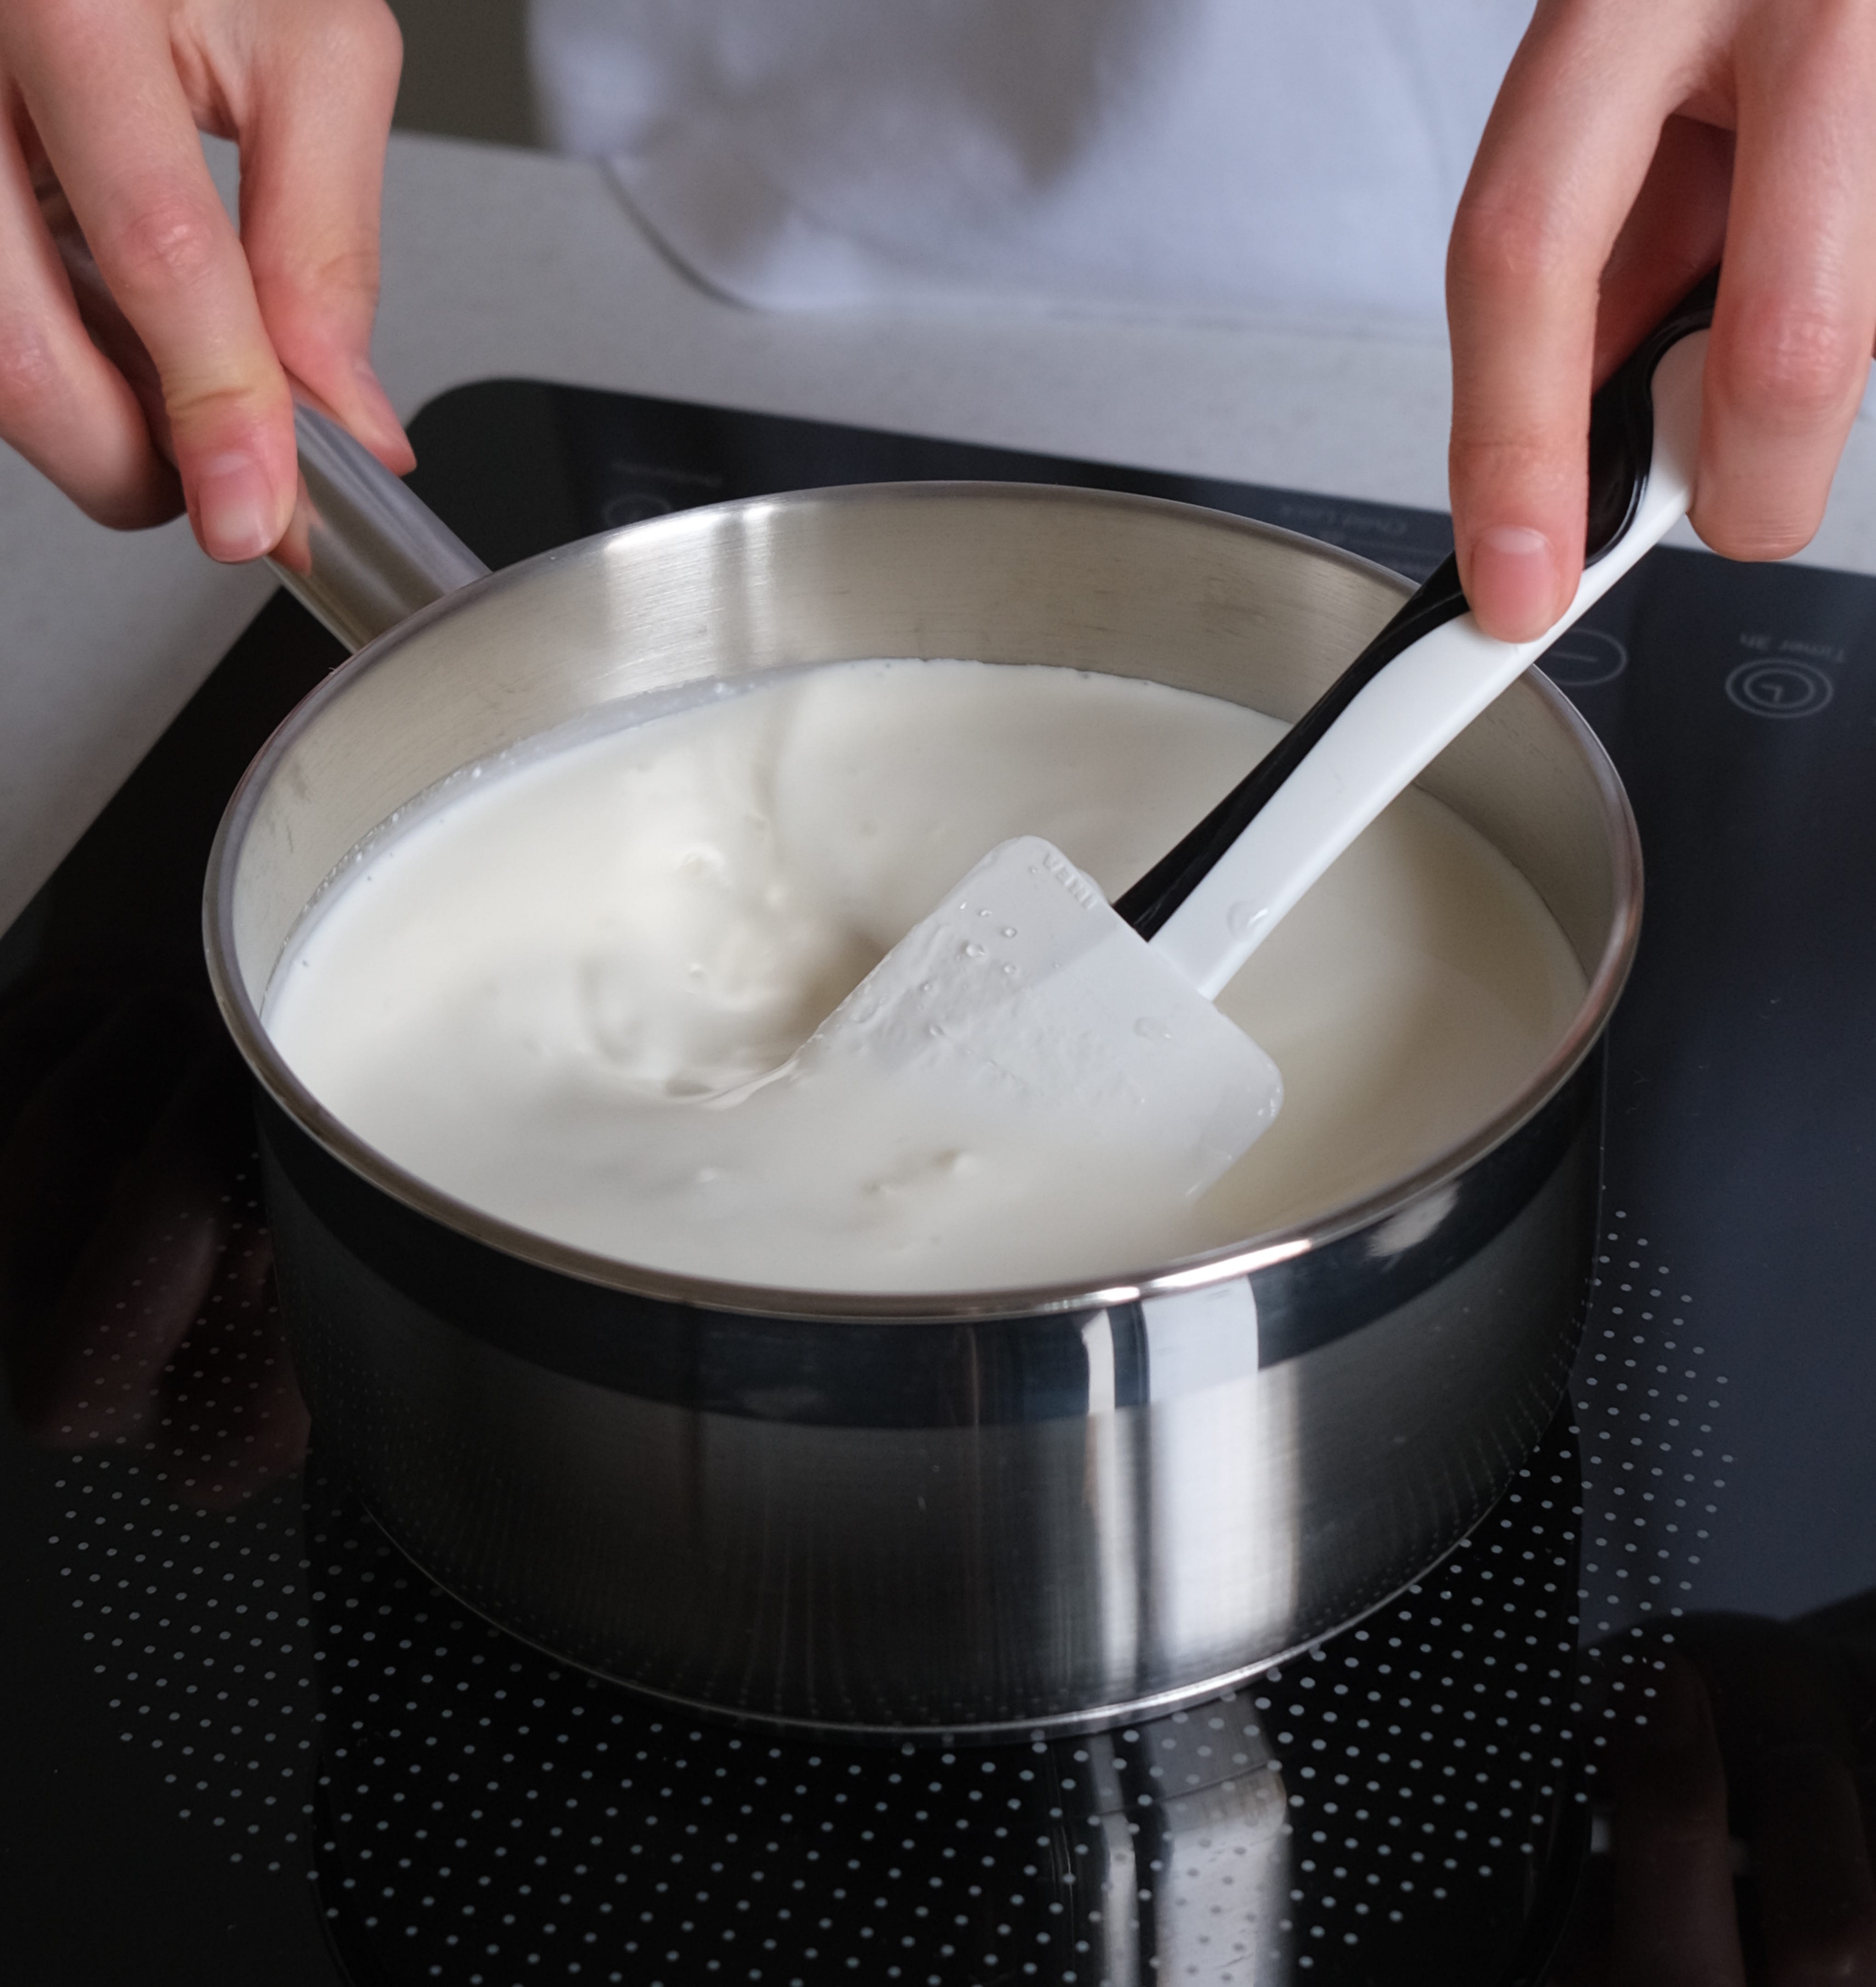
Combine water, sugar, heavy cream, and glucose syrup in a saucepan. Mix well with a spatula. Bring the mixture to a boil. Bring to a boil, don’t boil. You see the first bubbles, turn off the stove.
Pour the hot mixture over the chocolate and gelatin. Let it sit for a few minutes to soften and melt the ingredients.
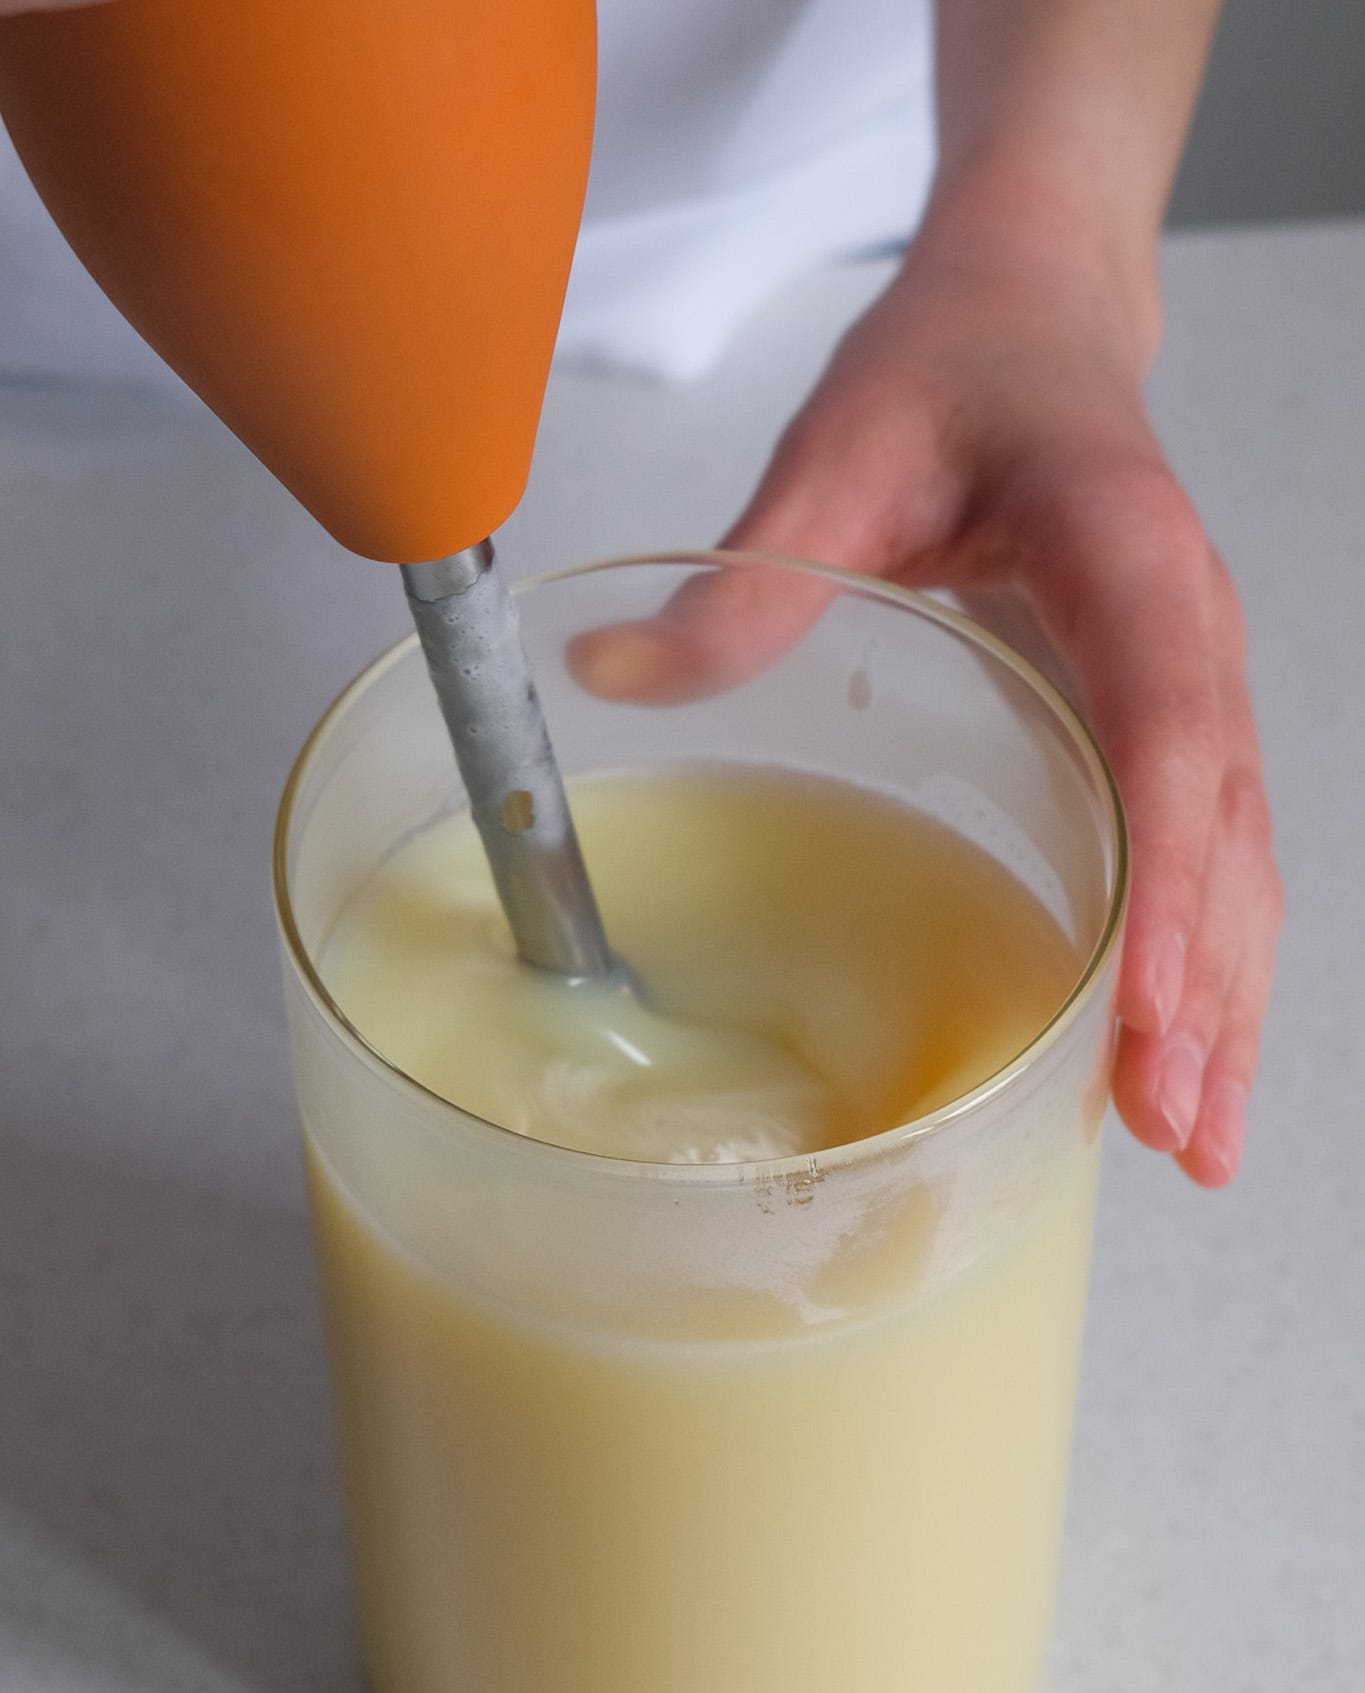
5. Blend the glaze with an immersion (hand) blender until smooth and fully emulsified.
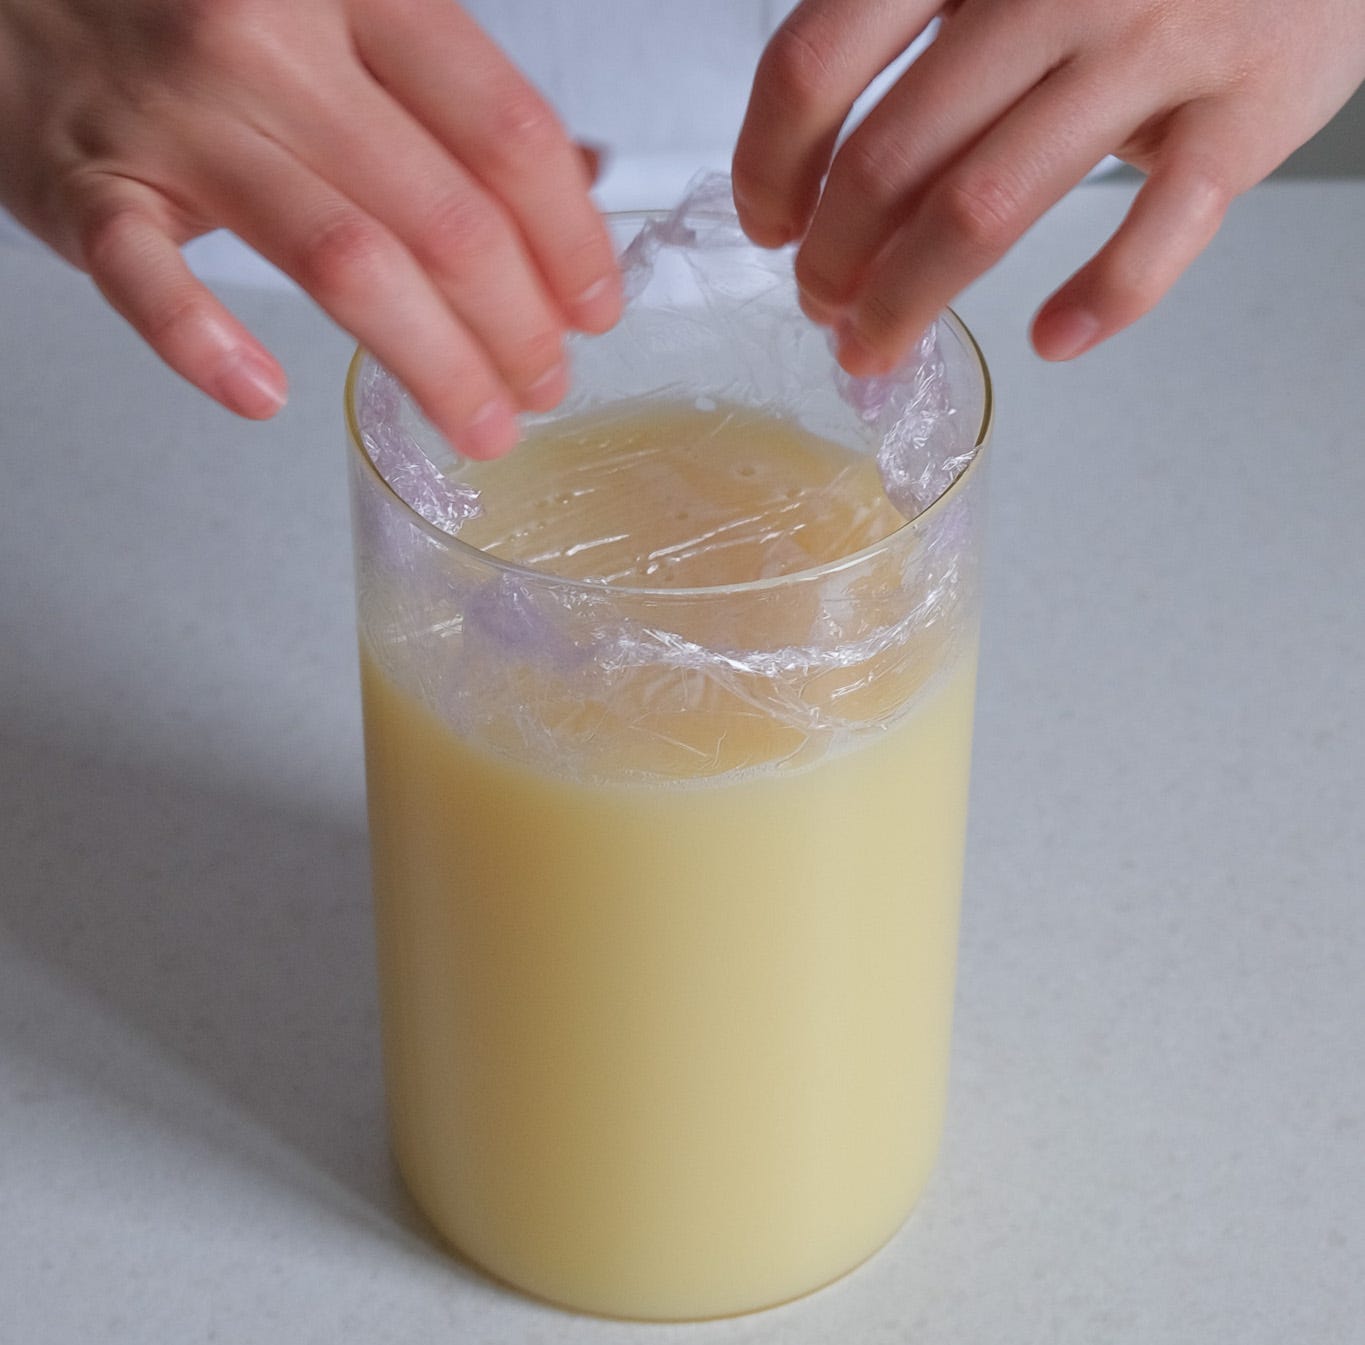
Cover the glaze with cling film, making sure it touches the surface to prevent a skin from forming. Let it cool at room temperature for about 30 minutes, then refrigerate for at least 8 hours.
Scoop out the amount of glaze you need into a narrow bowl or jar that’s microwave-safe. Heat it in the microwave on high for 20–30 seconds, until about half of the glaze is melted. The other half should still be in solid pieces — like this.
If it’s not quite there yet, put it back in for a few more seconds.
If you don’t have a microwave, you can use a double boiler. Place the glaze in a bowl and gently heat it the same way — until half of it is liquid and the rest is still in pieces. Stir with a silicone spatula to combine.
Then start blending the mirror glaze with an immersion blender. (I use one from Zepter MixSy — I’ve had it for about 8 years and still love it.)
Your goal is to combine the melted part of the glaze with the solid pieces. For best results, use a narrow, tall cup. Insert the blender and begin by cutting through the solid chunks. Once it’s mostly combined, tilt the blender slightly and blend at an angle to create a vortex — but make sure the blender head stays fully submerged. If it lifts up, you’ll start creating bubbles.
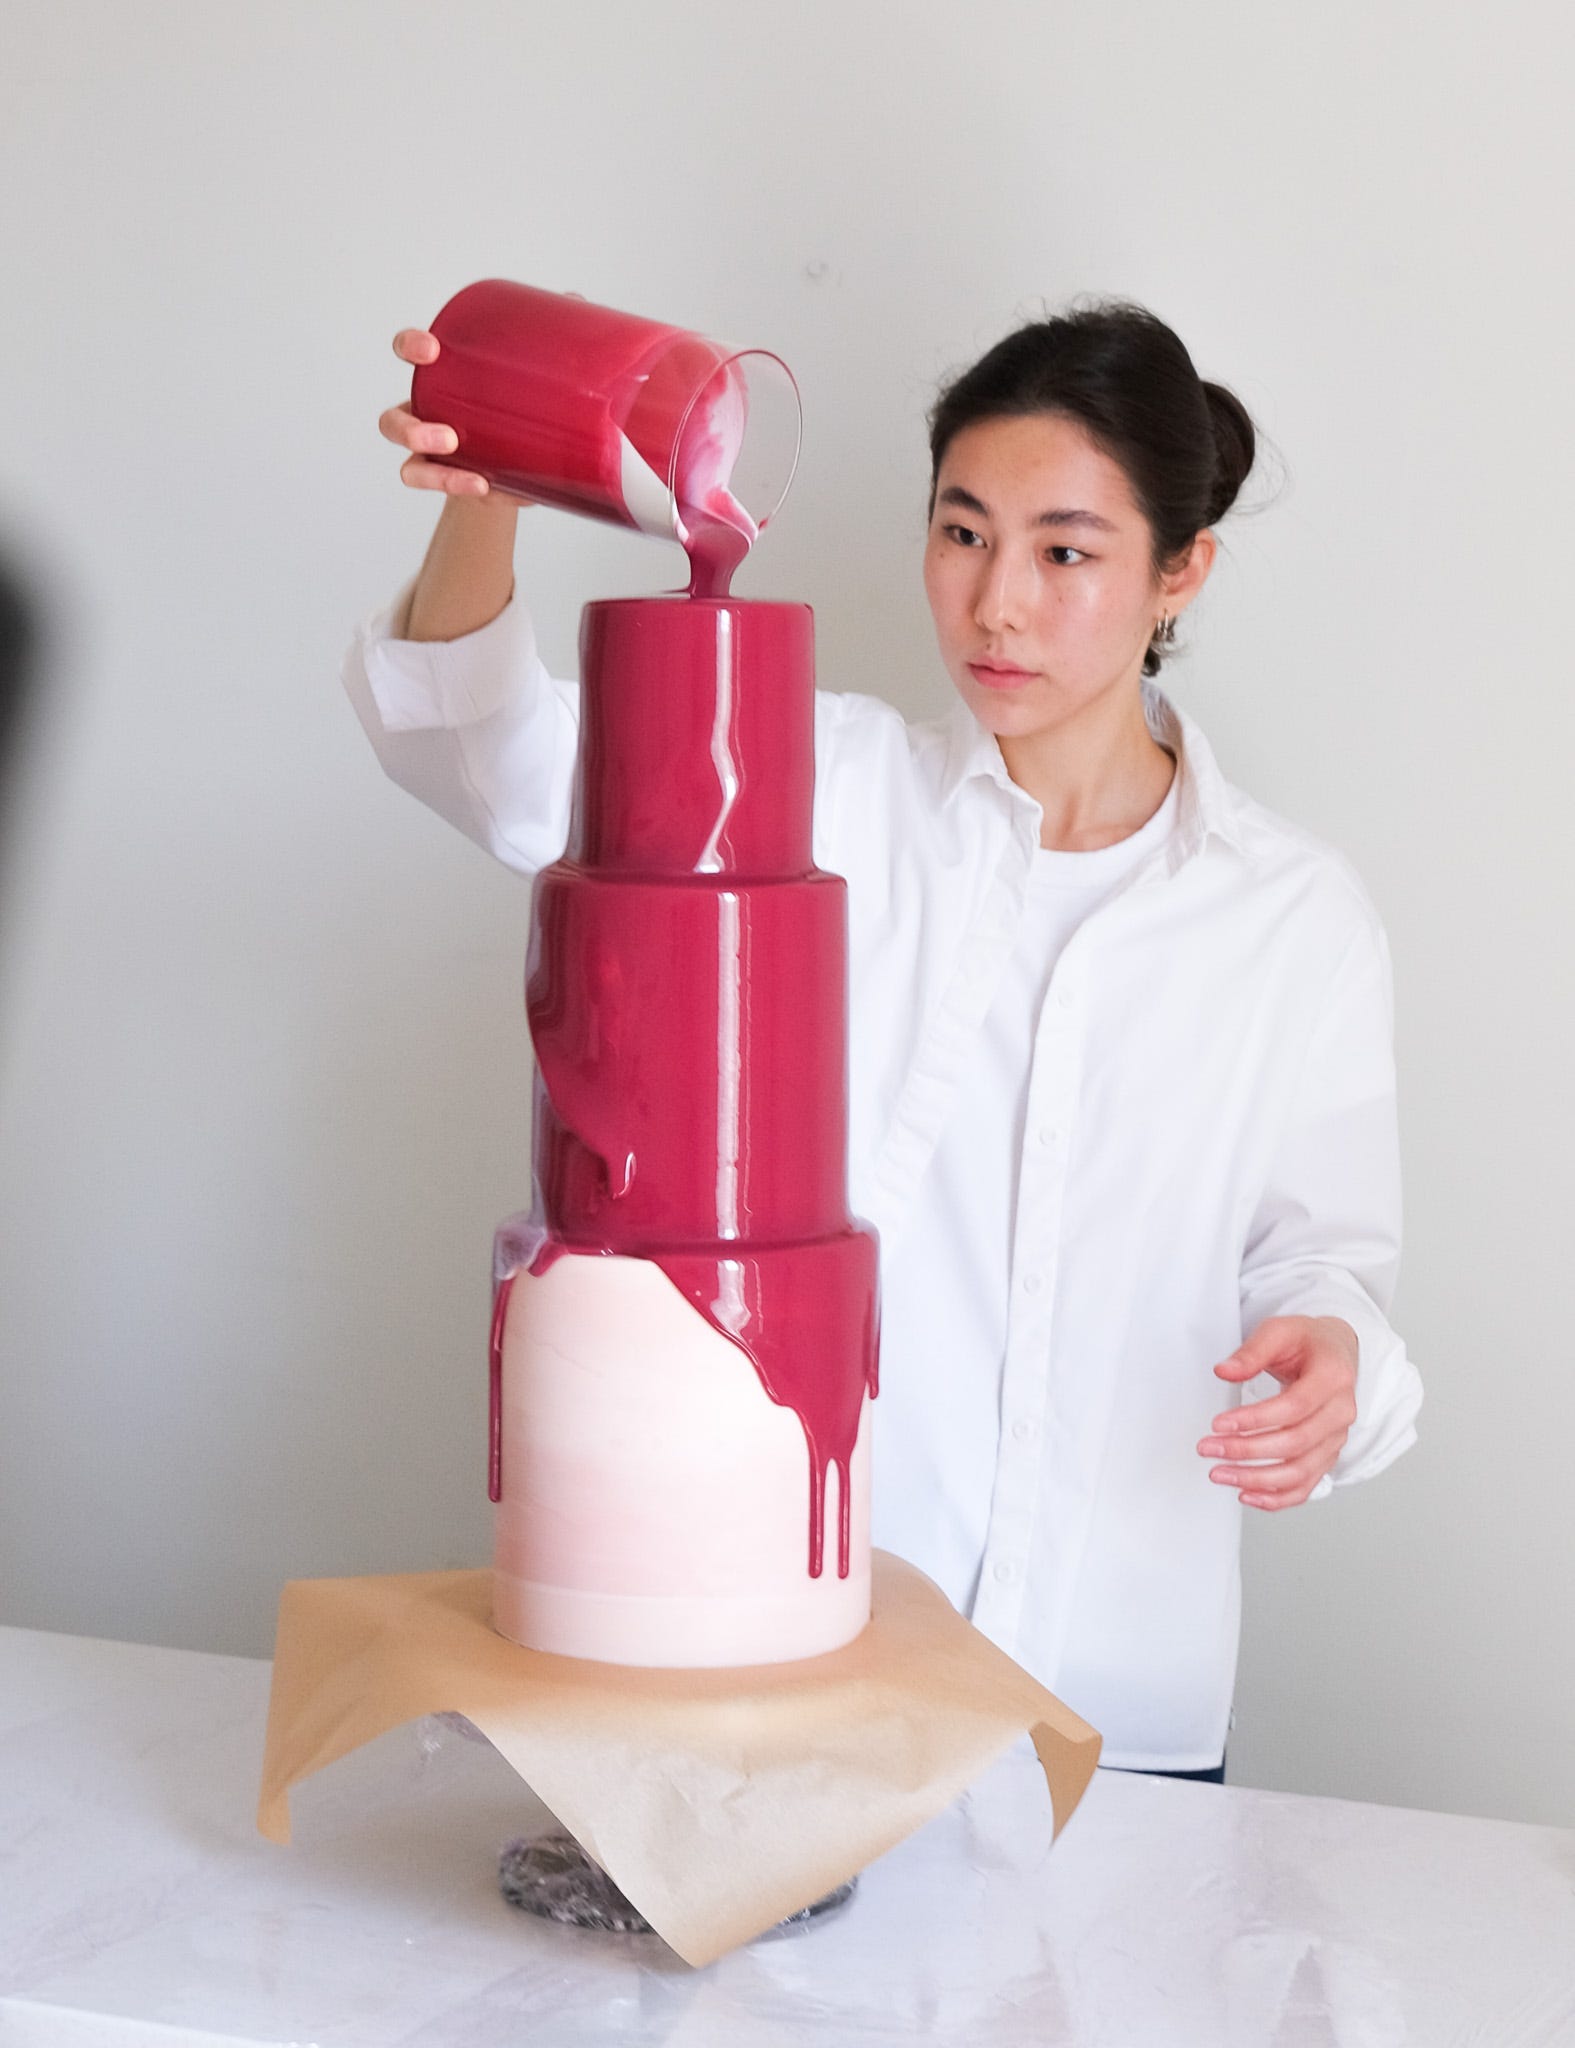
Color your glaze using water- or fat-soluble food colorings. You can use either powder or gel — both work well. I’m using powder colorants from KondiPro here. I actually ran out of Colour Mill (they’re my favorite!).
For this pour, I started with purple to get a deep base, then added a pinch of burgundy. You can also add white food coloring if it’s allowed in your country — it helps reduce transparency and gives the glaze a more solid, opaque look.
There are so many ways to use mirror glaze. You can mix two colors in the same bowl, then pour the two-tone glaze over the cake. You can swirl them together with a spatula, or simply pour one color into the other and use that blend directly. You can play around with color combinations and ratios — but always make sure the temperature of each glaze is the same.
If one is at 28°C, the other needs to be 28°C too. This helps prevent one color from melting into the other.
Here, I’m mixing burgundy red with a small amount of white glaze. The coloring process is the same no matter what shade you’re going for: just add gel, powder, or oil-/water-based food coloring and blend until fully dispersed.
To make cleanup easier, wrap your table and turntable with cling film. Then, cut a square piece of parchment paper with a hole in the center — the hole should match the size of your cake.
Place the parchment over the cake so that the glaze drips straight down. This way, you can collect the excess glaze easily and keep your setup clean.
For the glaze to stick properly, the cake surface needs to be cold. Place the cake in the freezer for about 1 hour, or refrigerate it overnight. The bigger the cake, the longer it needs to chill.
Also, make sure there’s no condensation on the surface — if there is, the glaze will slide right off. You can glaze cakes that are covered with ganache or a very stable buttercream.
Pour the glaze when it’s at 28–30°C. Use big, confident movements — try to pour as much as possible in one go so it flows all the way down the sides. Make wide circular motions as you pour. You can also add white glaze on top, like I did in the video.
Once the cake is fully covered, let the glaze drip for 5–10 minutes. Then carefully remove the parchment and collect the leftover glaze.
You can reuse it — just store it in the fridge, then melt, blend, and use it again.
wow this is so captivating
I didn't know that I can use a glaze mirror over a frozen butter cream …..Thank God